

Blog Planner 2016 is now available! Click here to get it!
If you used and liked the Blog Planner 2014, you’ll love the Blog Planner 2015! It has all the same pages and forms you loved form 2014, plus some pretty awesome new ones.
New for 2015 –
- 2-page monthly calendar
- Lined monthly calendar for 2 posts per day
- 2-page week-at-a-glance
- Ideas for future posts by catergory
- Project/Post planning pages
- Social Media Trackers
- Link-Up Tracker
- Binder Spine
The Blog Planner 2015 contains 100 pages for you to download, pick & choose which ones will work for you, print, and then either have bound or place in a binder. This planner is sure to get you organized for a new year of blogging in 2015!
Once you complete your purchase you will get an email with the subject line, ‘Thank you for your purchase from My Joy-Filled Life,’ This email will contain a link to your planner. Please be aware that this link will expire after 3 days and 3 uses, so download it immediately to your computer.
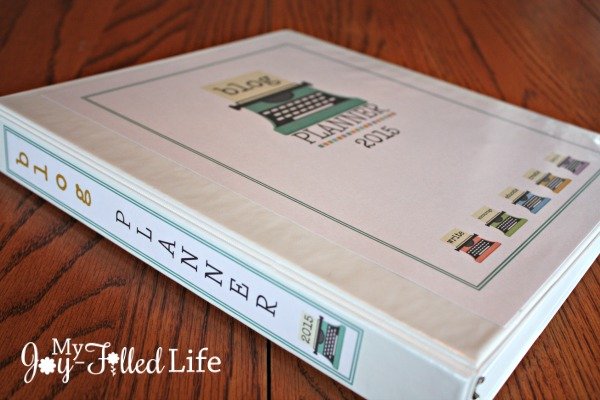
Here are some pictures showing how I put my planner together. I prefer putting the planner into a 3-ring binder instead of having it bound together because I feel that the 3-ring binder offers more flexibility. By using a binder, I’m able to add pages as needed, take pages out, and rearrange them if I want.
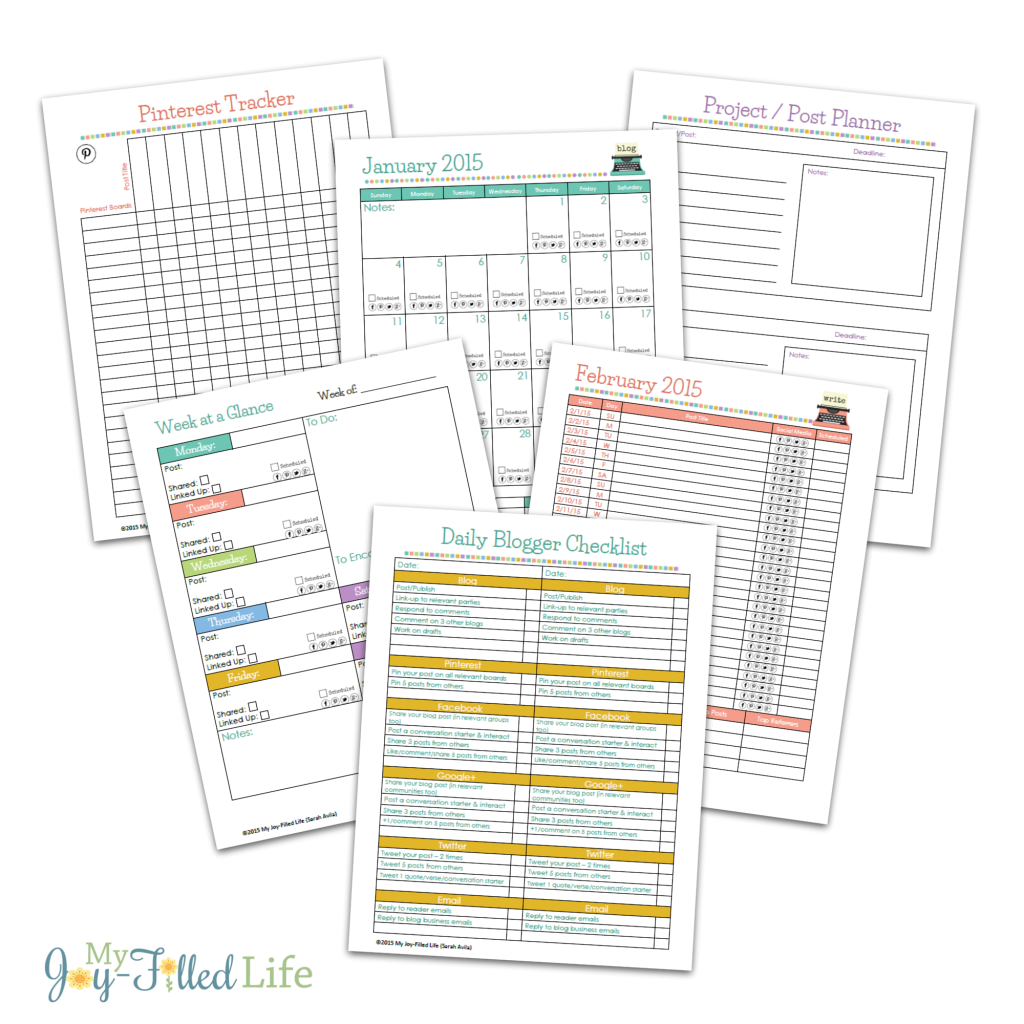
I decided to use the 2-page monthly calendar for 2015 to keep track of all my blog posts and blog-related commitments. Last year, in the Blog Planner 2014, I only had the 1-page monthly calendar available (grid view), so I’m excited to be able to add the 2-page monthly option this year.
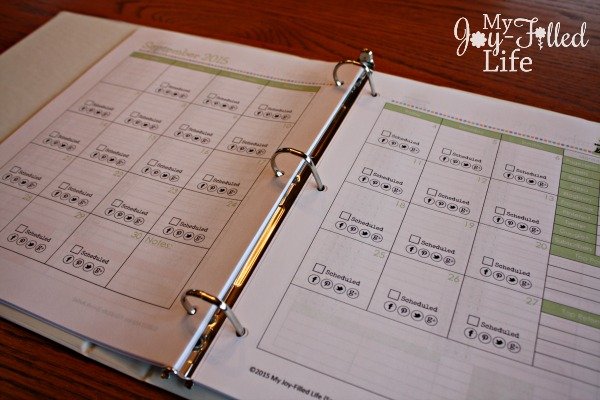
I also like to use the lined monthly calendar so I can actually see all of my commitments in order (from top to bottom). So when you flip the page above, you see the lined monthly calendar (2-post option), and opposite that is the to-do list & monthly goals page. Then when you turn that page, you go on to the next month.

All of the monthly calendar pages has a space to keep track of your monthly blog stats, social media stats, your most popular posts for the month, and your top referring sites for the month. There is also a separate page you can keep track of all of your monthly stats all on one page (I actually do it in both places).
Another new feature to the blog planner for 2015 is the social media tracking pages. There is a page where you can track of your social media shares all on one page, or you can choose to use a separate page for each social media outlet (Pinterest, Facebook, & Google+). There is also a form for tracking what link-up parties you’ve shared your posts with and is set up just like the social media trackers (if you are looking for places to link up, click here).
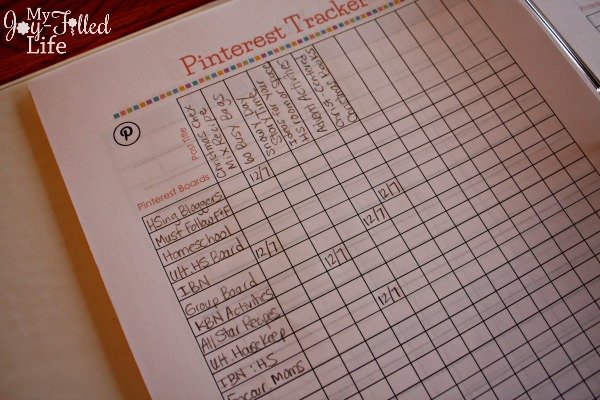
To use the social media trackers, you’ll need to write down all of your Pinterest boards (or Facebook pages/groups or Google+ pages/communities) in the left hand column. You may need to abbreviate some of the board names to fit in the space (sorry, there is only so much room to work with). Then you write your post titles at the top of the chart. There are 13 spaces, so I figure that the average blogger would need one page per month. When you share the post, simply write in the date that you shared it.
If you share a post to the same board, group, or community more than once (some group board owners let you share multiple times as long as there is a certain amount of time between sharing the same post), just erase the last date shared and fill in the new date. That way you will always know the most recent share date (this is only a suggestion on how to use this form). I only use these forms for keeping track of what and when I share to group Pinterest boards, Facebook groups/pages, and Google+ communities because I’m more concerned about making sure I don’t double-share to other people’s groups/boards, than I am about sharing twice to my own.
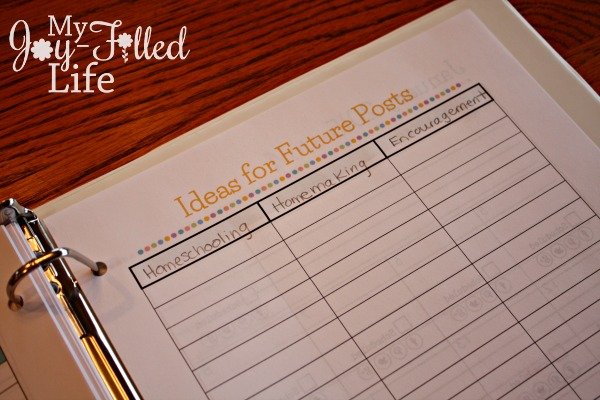
I’ve included two different forms for keeping track of and brainstorming future post ideas. One is a two column page for you to simply list your ideas. The other page is similar, but it has 3 columns and a space at the top of each column to write in a category. This way you can keep track of your post ideas by category.
The Daily Blogger Checklist isn’t a new form, but I’m going to try using it a little differently next year. Instead of making lots of copies of that page, I’m going to laminate it so I can use it over and over again. I suggest using a Wet-Erase marker instead of a Dry-Erase marker because they Wet-Erase ones won’t smudge (you just need a little water when you wipe it clean).
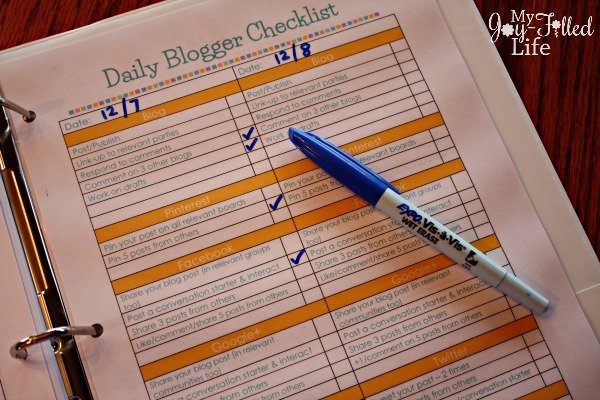
I’m also planning to use this page as kind of a bookmark for my blog planner. I will insert it in front of whichever month we are in and that way it will be easy to flip to where I need to be (although I rarely close my planner; it is usually laying open on my desk).
Here is a list of all of the forms/pages that you will find in the Blog Planner 2015:
- Year-at-a-glance
- 1-page monthly calendar
- 2-page monthly calendar
- Monthly calendar – lined
- Monthly calendar – lined (2 posts per day)
- Monthly to-do/monthly goals list
- 1-page week-at-a-glance
- 2-page week-at-a-glance
- Ideas for future posts
- Ideas for future posts by category
- Project/post planner
- Yearly stats
- Social media tracker (all on one page)
- Pinterest tracker
- Facebook tracker
- Google+ tracker
- Link-Up tracker
- Affiliate info tracker
- Reviews & Giveaways tracker
- Guest/contributor posts (incoming & outgoing)
- Blog post checklist
- Daily blogger checklist
- Review checklist
- Giveaway checklist
- Advertisers/Sponsors tracker
- Expenses/Earnings page
- Long term goals
- Notes page
- Binder spine
*The ones in bold are new additions to the blog planner.
So there you have it – all of the pages that are included in the Blog Planner 2015. There are plenty for you to pick and choose from to make a blog planner that meets your needs.
What others are saying –
I have been using the blog planner from My Joy-Filled Life for over a year now. I just got her new 2015 blog planner and I LOVE it! Since Sarah is such a successful blogger herself, she knows what other bloggers need to stay organized and on top of their blogs. She has thought of everything! From tracking our social media information monthly, to article planning and brainstorming, to the Week at a Glance with daily reminders for linkups and sharing via social media. But the checklists are my favorite aspect of her planner. She has thought of everything! I also love that I can customize my planner to fit how I work. This planner is perfect for beginner bloggers as well as offering nice reminders for more seasoned bloggers! I highly recommend you try this planner and see if you don’t agree!
Trish @ Live and Learn Farm & Co-owner of Hip Homeschool Moms
So far, the best blog planner I’ve found was created by Sarah Avila at My Joy Filled Life.If you are a blogger and don’t already have a planner in place, you will greatly benefit from Sarah’s planner. It includes all the things you need to do to promote your blog via social media, as well as charts to help track and plan for reviews and giveaways. It is what I am using in the new year to stay focused on my goals and keep my blog humming. I recommend Sarah’s Blog Planner. It’s $4.99 but worth every penny.
Monica @ Happy & Blessed Home
I love all kinds of planners, but when I need to focus and manage my blog, social media, affiliate programs, ideas for products and giveaways, etc., I use Sarah Avila’s Blog Planner. If you are a serious blogger in need of help brainstorming and organizing your blog for 2015, then you are in for a treat!
Jasmine @ Learning with Mom
Read the reviews at –
Just a reminder – This is NOT a physical item! You will NOT receive anything in the mail. This is an item that you download and print out yourself.
Once you complete your purchase you will get an email with the subject line, ‘Thank you for your purchase from My Joy-Filled Life,’ This email will contain a link to your planner. Please be aware that this link will expire after 30 days and 6 uses. If you get an error when clicking the download link, keep trying as the site as been acting up today.
If you are interested in becoming an affiliate, click here.


First, thank you for making this, and for the sale! I entered the blogfree code at 9:04, and it worked! However, since the total is Zero, paypay won’t let me enter my information and check out. Let me know what I should do!
thank you again. I’m excited to start working with this!
I tried to get the planner but it would not through paypal. It sad to enter amount greater than zero. Is there another way? Thanks!!!!
I actually waited up to try to get this for free (I’m working night shift, so early morning is my bedtime), and it showed the discount code worked, but when I pushed the “checkout with Paypal” button it gave me an error message of “error establishing database connection” and when I tried again it took me to a Paypal page with the error message “please enter an amount greater than zero.” I’ve tried to make it work for ten minutes and even opened up another browser – not sure if it just hates me or if it’s something on the shopping cart side (e-commerce can be SO tricky!). I was really looking forward to this too, I loved last year’s!
I tried to get the planner but it would not through paypal. It said to enter amount greater than zero. Is there another way? Thanks!!!!
I am trying to download the planner and I have the free code but when it goes to paypal when I click the check out button it won’t let me because it says it needs to have something more than zero in the amount. What do I need to do?
Thanks
I’m having trouble and keep getting errors when I try to check out. Am I doing something wrong? I took a picture of the free discount applied since I’m having so much trouble checking out.
Thanks so much for the deal! This looks like the best blog planner I’ve seen yet!
Thank you so much for this. This does look like a really sharp Blog Planner for sure. I appreciate you taking the time to create this and also sharing it with us.
Sarah, this is fabulous! Thank you for producing this *and* for running this promotion. My blog goal for December is to get organized for 2015. Your planner is perfect for my workflow and thought process. Wishing you a wonderful Christmas and 2015, Steph
Thanks so much for the planner. I really appreciate it. It is so nice and organized. Blessings to u.
Thanks, this looks great! There are a few pages I really like that aren’t in other planners. And I like the simplicity of it!
Thank you so much for the opportunity! Sad that I missed the free ones, but the 50% off is a steal! Thanks!
Thank you Sarah for creating such a great blog planner! I loved using your 2014 version and can’t wait to print off this new 2015 one. Here’s to a productive 2015 for all of us!
This looks awesome! I can’t wait to start using it! Thanks so much for sharing! Visiting form Inspire Me Monday.
Is there still a code we can use to get the planner for half off I remember? I thought it was till the end of the month. But not sure. I was thinking about getting it. Thank you
trying to order this, but not having any success. Any suggestions?
Deb – You should be able to order it right from this post. There is a box where you can add it to your cart at the end of the description of the planner.
Hi Sarah, can you tell me what size binder you recommend to hold all of the blog planning pages? I’m guessing from one of the pictures posted above, maybe a 1-1/2″ or 2″ binder? Or should I go larger if you, yourself find your binder a little cramped?
Thanks in advance!
Hi Jenine –
The binder I use (the one in the picture) is a 1″ binder. It all depends on how many of the pages you are going to print. I don’t think you would need more than a 2″ one if you were going to utilize most of the pages. Hope that helps.
Awesome thanks for sharing this.
This looks awesome! I saved it to download soon. =-)
Hi Sarah, I am wondering if you have your ‘Blog Planner’ in an undated format by any chance? I would love to buy it for a friend who has just started blogging, but we are nearly at the end of the year, so thought I would ask.
Thanks so much
Lisa
Hi Lisa – I do plan on making an undated version soon; probably end of November or beginning of December.
Hi Sarah,
I see your comment above about undated pages. Will you have pages for 2016, or will they just be undated for the future. Thanks. Looking forward to finding a tool that works and getting organized in the new year!
I’m planning to just having an undated one.
Wondering if you will have a 2016 calendar soon?? This would be a great improvement to my current system.
I will be coming out with an undated version probably the end of November.
I just purchased the 2016 @Karyn and I’m BLOWN AWAY! BEST BLOG PLANNER/BEST PRICE/#Finally #BestPlannerEver!!!
When will your 2016 blog planner be available?
hello, Ive found your planner by browsing sarahtitus.com and I too am wondering- will your 2016 calendar be available soon? Thank you so much!
Yes, I will have it out this week.
I just purchased the 2016 – found it through SarahTitus also… and I’m BLOWN AWAY! BEST BLOG PLANNER/BEST PRICE/#Finally #BestPlannerEver!!!
Me again… I forgot to mention. I also laminated my calendar, but even my wet erase markers sometimes smeared on the page.
Best Solution Ever…. Write on it/them with a fine point sharpie and (when you are ready to erase) just grab any cheap dollarstore’ dry erase marker like a highlighter OVER the sharpie marks AND WIPE with eraser/cloth, etc!
It INSTANTLY removes the perm marker/writing! If you have a kid (or two like me) they will LOVE this chore as they “magically” do the impossible and erase your sharpie marks!!! ??❤️
Here in search of your new undated planner! Kim from @Stuffed Suitcase sent me! Can’t wait!! Thank you!
Hoping to have it done this week; it’s almost there! Thanks for your patience!
The 2016 Blog Planner is now available! And it’s 50% off through Friday!!
https://www.myjoyfilledlife.com/2015/12/09/blog-planner/
Hi! I was looking at purchasing your planner but I was wondering if you might be about to come out with a new one for 2016 and if so, when might that be available?
Thanks so much!
Hi Holly – the 2016 planner is available. There is a link to it at the top of this post.
i purchased this in February, and when I tried to download it to print it won’t let me. I get an error. I tried emailing about it, but have not received a response. I really need some help!!
Are you aware that this is the 2015 Blog Planner?